
📌 Disclaimer: This tutorial was first published in December 2013. Some links may no longer work and any pricing mentioned may be outdated. The techniques and methods, however, remain valid—so we're happy to keep sharing it.

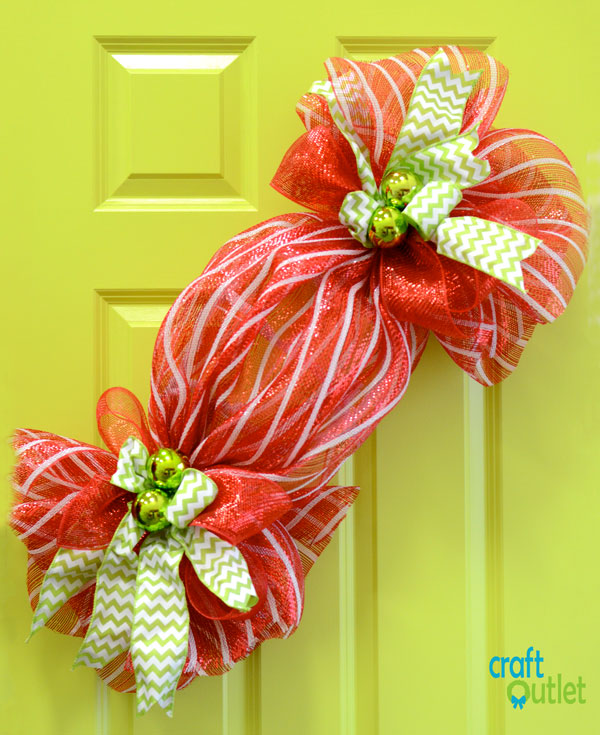
Here is a sweet holiday treat that you will not feel guilty about. This cute Christmas wreath looks like a piece of your favorite wrapped holiday candy. Created with red and white striped deco mesh and a new table work form, this Candy Wreath can be made in a less than 15 minutes.

Supplies
21" Deluxe Red & White Striped Deco MeshLime Green Tinsel Tie Balls (2 per end)
2.5" Green and White Chevron Ribbon
4" Red Deco Mesh Ribbon
White Work Table Form
Time/Cost
This is a very simple decoration to make. The Christmas candy wreath took under 15 minutes to make. The supplies for the project cost around $36 but we only used partial rolls of each product so you could make more than one wreath.Christmas Candy Wreath Tutorial:

Step 1: About 12" from the end of the roll, evenly gather the deco mesh from each side.

Step 2: Insert this gathered section of deco mesh into the set of tinsel ties on the pointed end of the work table form. Secure the mesh by twisting the two ties together.

Step 3: Pull the mesh across the work table form. At the other end, gather a section of mesh and secure into the two tinsel ties on the other end point. Cut the mesh from the roll, leaving a 12" long tail.

Step 4: Starting at 12" from the end of the roll , again gather the mesh from each side. Re-open the tinsel tie and insert this gathered section of mesh.

Step 5: As on the top, pull the mesh across the form, gathering as you go to create the rounded candy shape. Back at the starting point, gather the mesh and insert it into the original ties. Cut the mesh off with a 12" long tail to match the original end.

Step 6: Wind the remaining unused tinsel ites around the form to hide them, as shown.

Step 7: Create two loops with the 4" red deco mesh ribbon and hold those in your hand. Repeat creating four loops. Trim the ribbon from the roll.

Step 8: Add two more accent loops and tails with the lime green and white chevron ribbon.

Step 9: Use the tinsel ball ties to secure this two looped ribbons together creating a loose bow shape.

Step 10: Add this bow accent onto the end of your candy by wiring it into the original tinsel tie on the form. Repeat the same process of creating a bow and add it to the other side.

The finished Deco Mesh Christmas Candy Wreath
 What a sweet tutorial! (sorry, we couldn't resist the pun.) We are excited about bringing you creative ideas on our new blog and website www.craftoutlet.com. Be sure to sign up for our emails so you don't miss any of our fun craft projects!
1 comment
Robin Barker
Thank you this looks like a fun project to try.