
📌 Disclaimer: This tutorial was first published in October 2014. Some links may no longer work and any pricing mentioned may be outdated. The techniques and methods, however, remain valid—so we're happy to keep sharing it.

Looking for a little playfulness for your tablescape? Our Stuck Santa centerpiece is a simple DIY that’ll be sensational on your table or mantle, giving your home an adorable and whimsical touch.

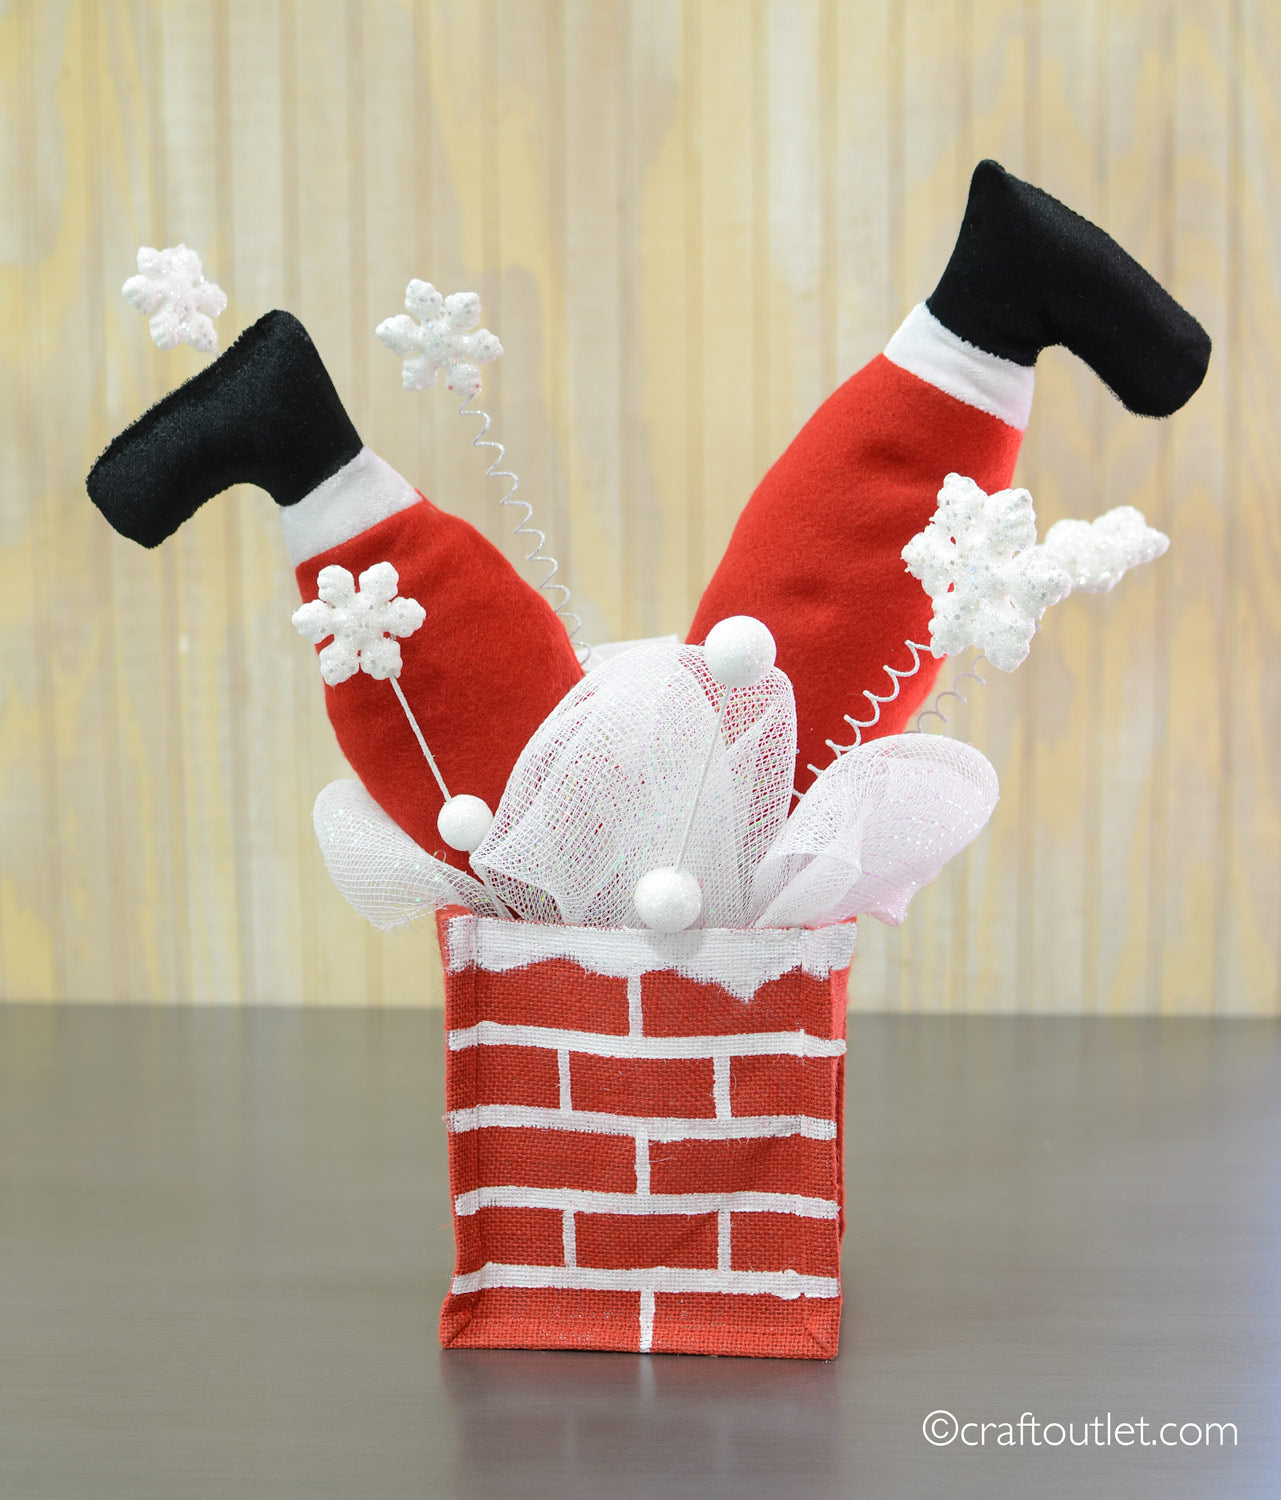
Supplies Needed:
- 5” Square Burlap Bag with Liner: Red $3.75
- 12” Plush Santa Legs $5.95
- 27” Snowflake and Ball Spray $3.75
- 21” Metallic White Iridescent Deco Mesh $5.95
- White Acrylic Paint
- Masking Tape
- Paint Brush

Keeping the burlap bag flat, sketch the wavy section of snow. Next lay your masking tape straight across, leaving 1/4” of space between tape lines. Paint 4 lines, let dry and remove tape. Lay vertical tape lines, leaving 1/4” of space between lines. In a brick pattern, alternate the placement of the vertical lines to achieve a stacked brick look, let dry and remove tape.


Repeat on all sides.

Place legs into the burlap box, they should fit fine without support, but placing floral foam into the box is also an option.

Cut three 20” sections of deco mesh, ruffle and stuff into burlap box.

Cut snowflakes from the spray and place those into the bag as well.


This project takes less than 30 minutes and costs just under $20. It’s a great, fun Christmas addition to add to your collection for years to come.