
📌 Disclaimer: This tutorial was first published in September 2015. Some links may no longer work and any pricing mentioned may be outdated. The techniques and methods, however, remain valid—so we're happy to keep sharing it.
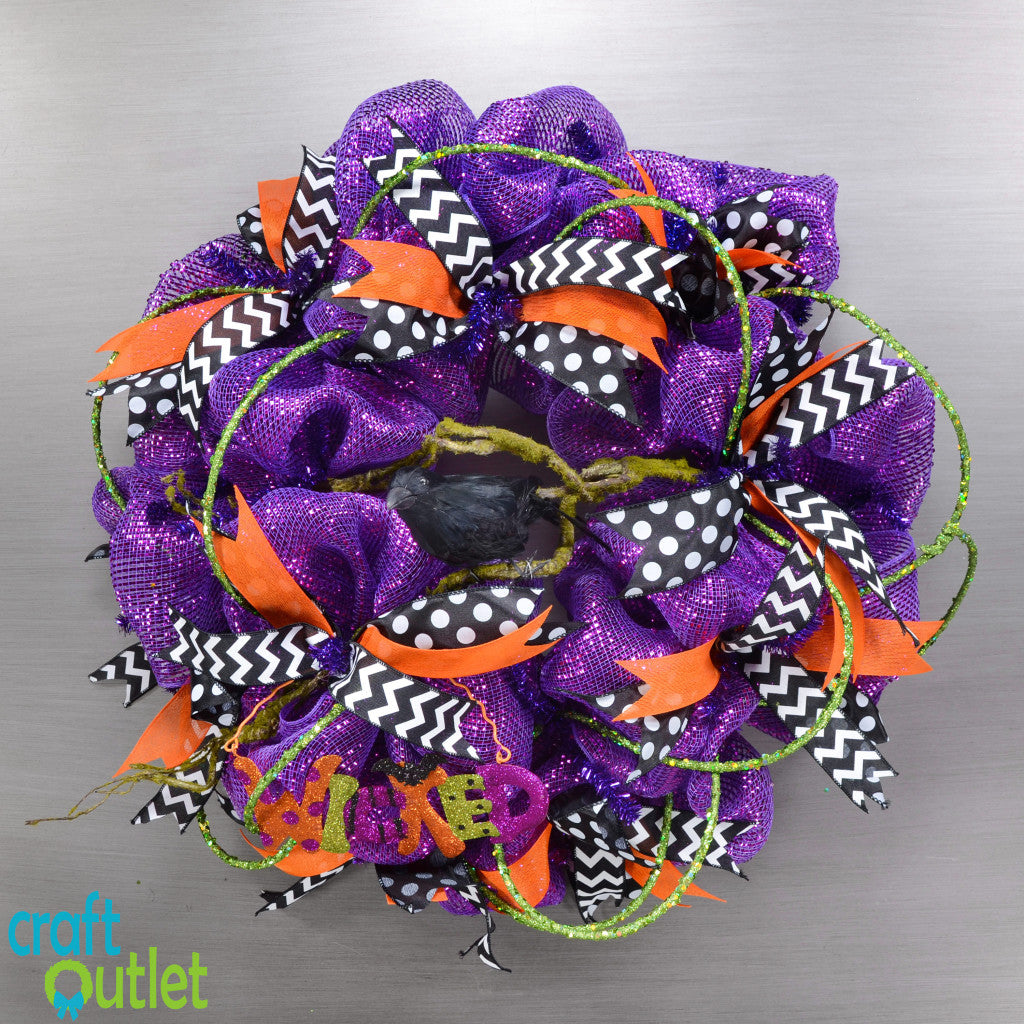
Are you ready for Halloween yet? We're so excited for the upcoming season we created a brand new wreath and video tutorial for you! In this video, we'll teach you how to create a spooktacular wreath perfect for any glamorous witch. Learn how to wire glamour rope throughout your wreath for the perfect glitzy accent. We also feature our multi-ribbon cutting technique which saves a ton of time on ribbon-cutting (which we definitely value from having and working with a giant selection of ribbons here!) We'll also show you how to add a few natural accents, like our spooky looking twig spray and an adorable crow!
You can buy all of the supplies in one easy step using our Wreath Recipe™ here.
Supplies
- 15-24" Tinsel Work Wreath Form: Metallic Purple
- 7.5" Black Feather Crow
- 8" Metal Wicked Halloween Hanging Sign
- 34" Mossy Twig Floral Spray
- 21" Poly Deco Mesh: Deluxe Wide Foil Purple - (10 Yards, We used about 7 Yards )
- Wired Glamour Rope: Lime - (25 Feet, We used 16 Feet)
- 1.5" Canvas Chevron Ribbon: Black & White - (10 Yards, We used 3.5 Yards)
- 2.5" Big Polka Dot Ribbon: Black/White - (10 Yards, We used 3.5 Yards)
- 1.5" Classic Faux Jute Ribbon: Orange - (10 Yards, We used 3.5 Yards)
We also used:
- Scissors
- Wire Cutters
- Yardstick/Ruler

Thanks for watching & shopping at CraftOutlet.com!