
Introduction
Large, fluffy bows have never been easier to make!
Em's Bow & Go Bow Maker is a game-changer for crafters looking to create stunning, professional-quality bows with ease. This innovative tool simplifies the bow-making process with its user-friendly design, featuring sturdy screw-in pegs, an easy-feed ribbon holder, and a compact folding structure for clutter-free storage. Perfect for beginners and seasoned artisans alike, it allows anyone to craft beautiful, full bows in minutes, making it an essential addition to any wreath-making or gift-decorating toolkit.
Read on to learn what makes the Bow & Go special, how to choose the right model, and best of all, how to make big, beautiful bows!
Already familiar and ready to get started? Then jump here for a video tutorial. See our Medium Bow ribbon formula here.
What makes the Bow & Go unique?
- Make bows with scrap ribbons. Reduce waste and save money!
- Work with large numbers of ribbons without stress. Your imagination is the only limit!
- Pain free. You don’t have to hold the bow in your hand as you make it; no more squeezing.
- Interruptions won’t set you back. The bow-maker holds everything in place while you work.
- Easy to store and portable! Bring it with you to demonstrate bow-making at craft shows and garner attention to your booth. The pegs fit nicely inside the unit when it is folded closed.
- Robust design. Pegs screw in, so they will stay secure as you work.
Which Size is Right for Me?
There are two versions of the Bow & Go, Standard and Deluxe. Both units function the same way, both units are portable, and all dowels are interchangeable.
We recommend the original Bow & Go for those who don’t need bows wider than 22” because it’s less expensive and more compact than its big sister.
However, the Deluxe version is capable of everything the Original is, and has the advantage of longer dowels, allowing you to add more ribbons (make bigger bows). The longer spool holding dowels also allows stacking more spools, which is very convenient. The deluxe model is the same length as a yardstick, making it easy to measure out bow loops up to 18” long and tails up to 36” long.
Already have the Original, but want the benefit of longer dowels? Buy our Extended Dowel Pack here.
Compare at a Glance
| 22" Bow & Go | 36" Deluxe Bow & Go | |
|---|---|---|
| Maximum Finished Bow Width | 22 inches | 36 inches |
| Maximum Loop Measurement | 11 inches | 18 inches |
| Maximum Tail Measurement | 22 inches | 36 inches |
| Dowel Length | 4.3 inches | 8 inches |
| Closed Measurements | 11.06” L x 3.94”W x 1.12”D | 18.12” L x 3.94” W x 1.9” D |
| Spool Holder | Holds up to three 1.5” ribbon rolls concurrently | Holds up to five 1.5” ribbon rolls concurrently |
| Price (at time of posting) | $19.25 | $29.95 |
| Pros |
|
|
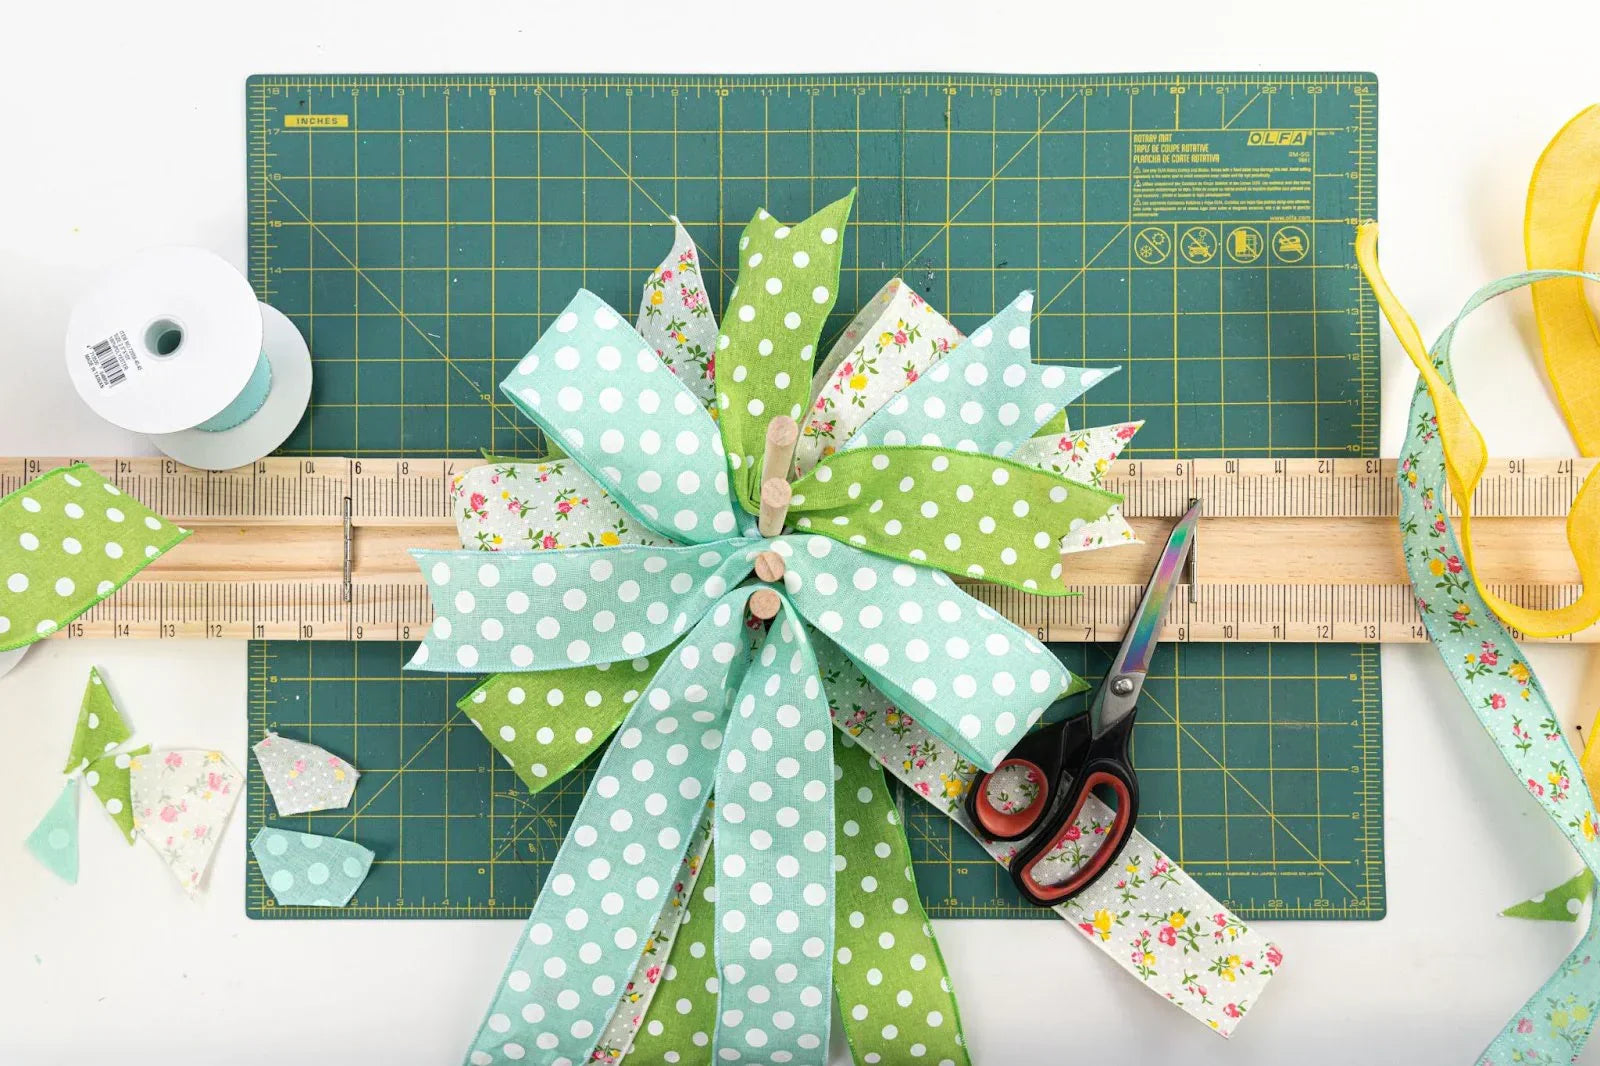
How to Use The Bow & Go
There are many successful ways to place ribbons in the Bow & Go, and it’s fun to experiment. But here, we will show you a simplified technique that is very beginner-friendly!
The Basic Method
Streamers - These are the long tails that go in the bottom gap. You can easily adjust the streamers to have equal-length left and right sides, or make one side longer than the other for interest - just remember to alternate which side is longer as you add ribbons to keep the bow balanced.
Loops and Short Tails (or our Figure Eight technique, seen above) - These go in the top two gaps. For bows with more than 6 ribbon loops alternate between the top and middle compartments to prevent overstuffing. For bows with 5 or fewer ribbon loops, just use the middle compartment.
The Figure Eight Loops 'n' Tails Technique
This basic configuration has two loops and two tails, creating a balanced look. It’s easy to do and also easy for calculations if knowing the total amount of ribbon used is important to you.
Watch the video below to see it in action!
Basic Techniques From The Video
- Find the center point of a chenille stem, zip tie or ribbon and place the center in the middle gap. Arrange at a diagonal. This is what you will use to secure the bow pieces together.
- Determine if you want a hanger. You can place it now, horizontally, in the top gap, or you can insert it at the end.
- Measure and cut your first Long Tail. Lay it over the first peg and allow the ribbon ends to hang off the edge of your table.
- Measure your first Figure Eight and set it in the middle gap. Arrange into an X shape. Short Tails should be diagonal from each other and the Loops should be diagonal from each other.
- Measure a second Long Tail and lay it over the first.
- Measure your second Figure Eight and set it in the top gap. Arrange into an X shape.
- Repeat steps 2-5 until you have used all your ribbons.
- Using the tie and your hands, gently lift the stacked ribbons off of the unit and secure. Don’t forget to add your hanger if you didn’t do this in step 2!
- Use your fingers or a pencil to curl the narrow-width ribbons.
- Fluff the loops and you’re done!
General Tips
- Use all of your widest ribbons first, then move on to the next-widest, and so on. Each time you move to a smaller size, decrease the length of the loops so that they will reveal the ribbons underneath.
- We recommend the length of your chenille stem/zip tie/ribbon to be at least 12” for the Original Bow & Go, and at least 20” for the Deluxe Bow & Go. This ensures you can wrap it around all the ribbons you are using, but if you are only using a few ribbons, you can use a shorter tie.
- Dovetail your ribbons as you work, or do them all at the end.
- Put more expensive/nicer ribbons toward the front to show them off.
- We recommend a 1:1 bow-to-streamers ratio (width to height), or a 1:2 bow-to-streamers. In other words, make your streamers just as long as the bow is wide, or make them twice as long as the bow is wide.