
📌 Disclaimer: This tutorial was first published in September 2014. Some links may no longer work and any pricing mentioned may be outdated. The techniques and methods, however, remain valid—so we're happy to keep sharing it.

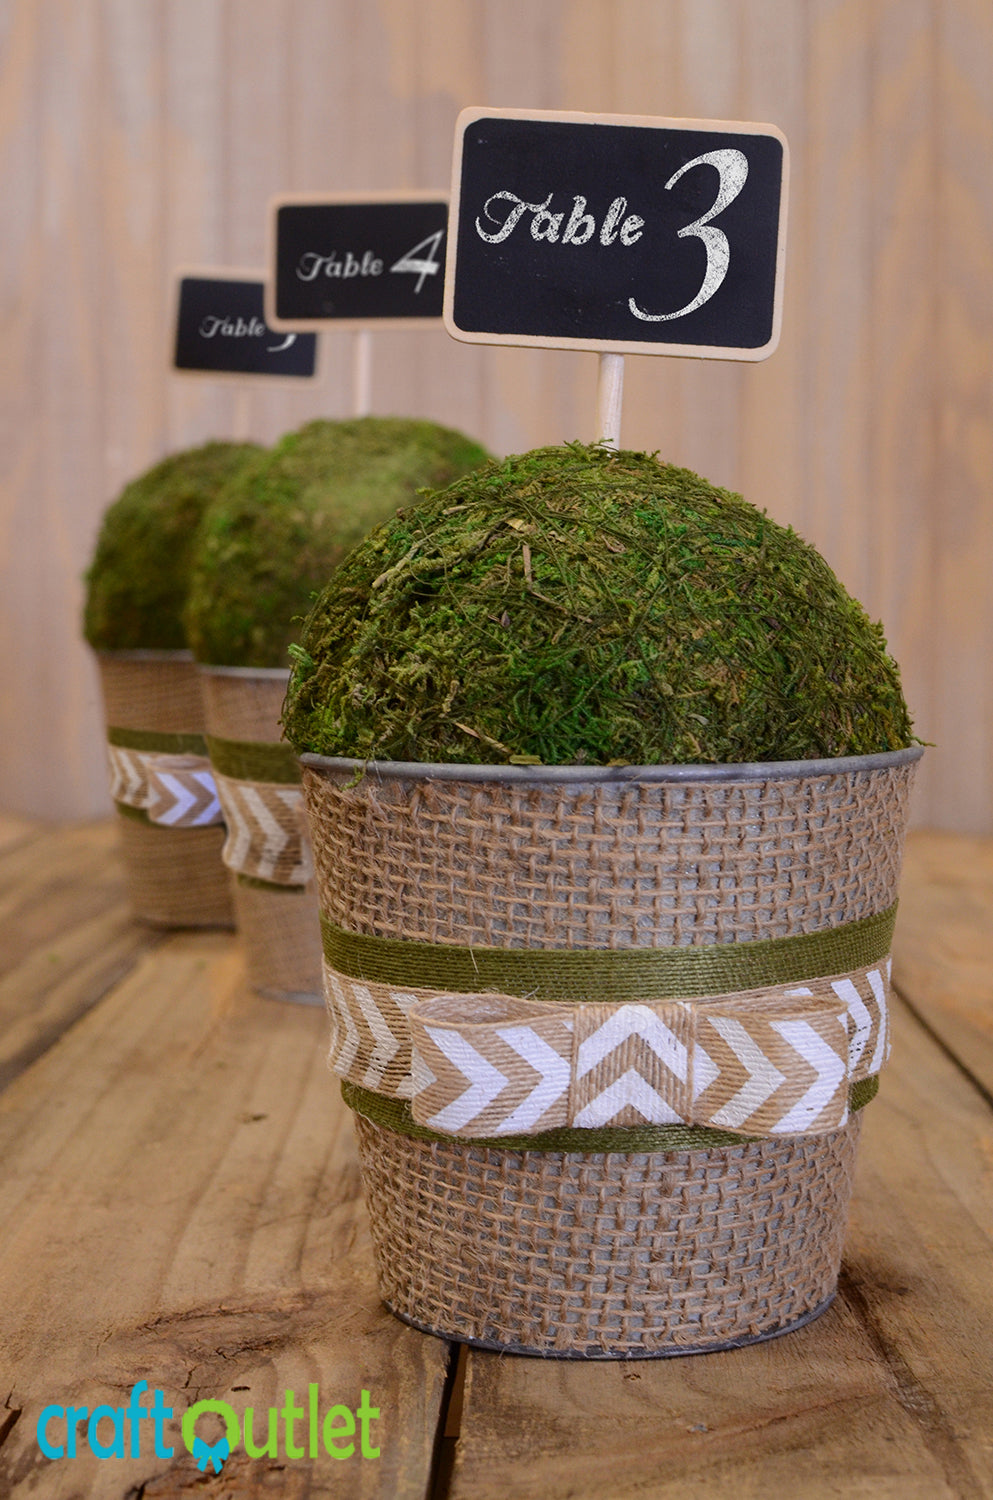
Creating an earthy, rustic look for your DIY wedding or party is easier than you think, and not to mention extremely budget friendly. Transplanting live moss can be a messy experience, and it's another fragile decoration to worry about. Create the look, but achieve it permanently with CraftOutlet.com. We'll show you how to make a beautiful and sturdy moss topiary place card holder that'll bring your theme to your table and awe your guests.

SUPPLIES NEEDED:
- 5” Moss Ball $2.25 ea
-
5” Burlap Wrapped Tin Pot
$4.00On Sale $2.95 ea - 7/8” Jute Chevron Ribbon $5.75 (10 yds)
- 1.5” Classic Faux Jute Ribbon $3.25 (10 yds)
- 8” Chalkboard Signs $7.99 (6 pack)
- Hot Glue or other adhesive

Before inserting the Moss Ball into the Tin Pot, the internal form needs to be cracked gently to allow it to fit snugly into the Tin Pot.

With pressure, place the Moss Ball into the Tin Pot. It should fit securely with no need for gluing.

Cut the green jute ribbon to 16” in length. Cut edges to a 55˚ angle. Apply glue to center of ribbon and place in the middle of the pot. Zig-zag the glue onto the ribbon, turning the pot and adhering as you go.


Secure the ends on the back with a spot of hot glue. The angled cut should allow for very little edge overlap and make it appear a little more seamless.

Cut the chevron ribbon to 15.5” in length
Repeat steps used previously with the green jute ribbon. Apply to the center of the larger ribbon, secure edges on back.


Cut the chevron ribbon into two strips. One strip measuring 7” and the second measuring 2”. This will be the bow.

Fold ends of the longer ribbon towards center, securing with a dab of hot glue. Taking the 2” ribbon, apply a small dab of hot glue onto the back, securing the end. Flip ribbon over and apply a zig-zag bead of glue and wrap ribbon. Secure edges on the back. With a dab of hot glue on the back of the bow, attach to the center of the chevron ribbon. Fluff the bow for desired effect.

Insert a Chalk Board pick through the center of the moss ball. It's easily removable, so writing before or after it's placed is up to you!

Place wherever it suits your decor. In addition to being a place card holder, it can be placed at a buffet to display menu options, or insert a photo clip and it can be an unique display for your photos!
This table number holder is extremely easy to modify for your tastes and color needs. CraftOutlet.com has a wide variety of ribbon colors and textures to select from.
Explore and design your own!
